
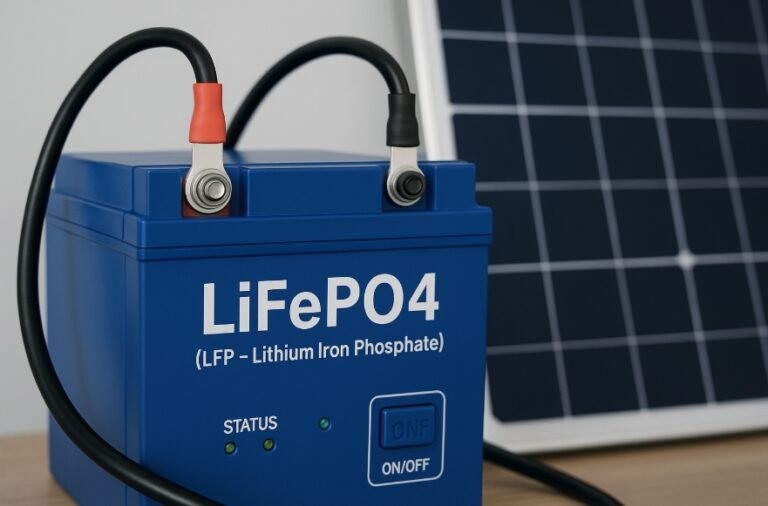
A new LiFePO4 energy storage battery may not turn on immediately after delivery. The display may remain dark, the indicator lights may stay off, or the inverter may fail to detect the battery.
In many cases, this does not mean the battery is defective.
To reduce standby power consumption and improve transportation safety, lithium batteries are often shipped with the main switch turned off or the Battery Management System, also known as the BMS, placed in sleep mode.
This guide explains how to activate a new LiFePO4 battery safely and what to check if the battery does not start.
What Does LiFePO4 Battery Activation Mean?
Battery activation means waking up the BMS and enabling the battery’s charging and discharging functions.
Depending on the battery design, activation may require:
- Turning on the battery breaker
- Pressing the power or reset button
- Connecting a compatible lithium battery charger
- Using the battery wake-up function of an inverter
- Starting the master battery in a parallel system
Activation is different from fully charging the battery. A battery can be successfully activated even when its State of Charge is below 100%.
Before Activating the Battery
Before connecting or switching on the battery, complete a basic inspection.
Check the battery enclosure, terminals, switches, display and communication ports for visible damage. Do not activate the battery if you notice swelling, leakage, burn marks, water ingress, abnormal heat or a strong unusual smell.
Confirm the following information on the battery nameplate:
- Nominal voltage
- Rated capacity
- Maximum charging current
- Maximum discharging current
- Positive and negative terminal positions
- Communication protocol
- Battery model and serial number
You should also confirm that the inverter or charger is suitable for the battery voltage.
For example, a 51.2V LiFePO4 battery must be used with an inverter and charger designed for a compatible lithium battery voltage range. Do not select equipment only because it is described as a “48V system.”
How to Activate a New LiFePO4 Battery
The following procedure applies to many rack-mounted, wall-mounted and floor-standing low-voltage energy storage batteries.
Always check the product manual because the exact startup sequence may vary.
Step 1: Turn Off the Inverter and Charging Sources
Before connecting the battery, switch off the inverter and isolate the solar, grid or generator charging input where required.
The battery breaker and power switch should also remain off during cable installation.
Step 2: Connect the Battery Cables
Connect the positive battery terminal to the inverter’s positive DC terminal and the negative battery terminal to the negative DC terminal.
Check polarity carefully before tightening the cables.
Use cables and DC protection devices suitable for the maximum battery and inverter current. Loose terminals or undersized cables can cause voltage drop, overheating and startup failure.
Step 3: Connect the Communication Cable
When closed-loop communication is required, connect the approved CAN or RS485 cable between the battery and inverter.
Do not assume that every RJ45 cable has the same wiring. Battery communication cables may use different pin definitions from standard network cables.
Select the correct inverter protocol and battery address according to the product manual.
Step 4: Turn On the Battery Breaker
Move the main battery breaker or power switch to the ON position.
On some batteries, this powers the BMS directly. On other models, the display will remain off until the activation button is pressed.
Step 5: Press the Power or Reset Button
Press the POWER, SW, START or RESET button according to the battery instructions.
Some batteries require a short press, while others require the button to be held for several seconds.
After activation, the battery may perform a short self-test. The LCD, RUN light or State of Charge indicators should then turn on.
Step 6: Check the Battery Status
Confirm that:
- The battery display is operating
- The RUN indicator is normal
- No persistent alarm is active
- The battery voltage is within the expected range
- The battery temperature is normal
- The BMS shows no serious fault
A 51.2V battery will not always measure exactly 51.2V. The actual voltage changes according to its State of Charge and BMS settings.
Step 7: Start the Inverter
After the battery is active, turn on the inverter according to its startup procedure.
Check whether the inverter displays:
- Battery voltage
- Battery State of Charge
- Charging or discharging current
- Battery temperature
- Communication status
Set the correct lithium battery charging voltage, charging current and low-voltage protection parameters before enabling full operation.
Activating a Battery with a Charger
If the power button does not wake up the battery, the BMS may be in sleep mode or low-voltage protection.
Some batteries can be activated by connecting an approved LiFePO4 charger.
The charger must match the battery’s nominal voltage and charging requirements. It should also have a controlled current limit.
After connecting the charger, monitor the battery display, voltage, current and temperature. The BMS may wake up after detecting the charging voltage.
Never use a random DC power supply or an incompatible lead-acid charger to force the battery to start.
Activating Multiple Batteries in Parallel
Before connecting several new batteries in parallel, check each battery separately.
The batteries should normally have the same:
- Model
- Nominal voltage
- Capacity
- BMS type
- Communication protocol
- Firmware version
- State of Charge
Measure the voltage of every battery before parallel connection.
Connecting batteries with a large voltage difference can create a high equalization current, which may cause arcing, breaker tripping, cable heating or BMS overcurrent protection.
For a parallel battery system:
- Activate and inspect each battery separately.
- Confirm that there are no alarms.
- Compare battery voltages and State of Charge.
- Turn all batteries off.
- Complete the parallel power connections.
- Set the battery addresses or DIP switches.
- Connect the parallel communication cables.
- Select one battery as the master when required.
- Restart the complete battery bank.
Use equal-length power cables or a suitable busbar arrangement to improve current sharing between the batteries.
Why Will a New Lithium Battery Not Activate?
Several common issues can prevent a new battery from starting.
Main Switch or Breaker Is Off
Check all battery breakers, rocker switches and emergency-stop controls.
Incorrect Button Operation
The battery may require a short press or a specific press duration. Holding the button too long may turn some batteries off again.
BMS Is in Sleep Mode
Connect an approved charger or use the inverter’s battery wake-up function if supported.
Battery Voltage Is Too Low
A battery in low-voltage protection may require a controlled recovery charge. Contact the supplier if the voltage is abnormally low.
Incorrect Cable Polarity
Reverse polarity may prevent startup and can damage the inverter or battery protection system.
Communication Settings Are Incorrect
The battery may be electrically active even when the inverter cannot detect it.
Check the CAN or RS485 port, communication cable, protocol and DIP-switch address.
The Battery Activates and Then Turns Off
This may be caused by:
- Automatic sleep mode
- Low battery voltage
- A large inverter startup current
- Loose cable connections
- BMS protection
- Incorrect startup sequence
Disconnect the inverter and check whether the battery remains active without an external load.
How to Confirm Successful Activation
Battery activation is normally successful when:
- The display and indicator lights operate normally
- The battery output voltage is stable
- No BMS alarm remains active
- The inverter recognizes the battery
- The battery accepts a controlled charging current
- The battery can supply a small test load
- Battery temperature remains normal
- State of Charge changes during charging and discharging
During the first startup, begin with a moderate charging current and a small load. Do not immediately operate the battery at its maximum charge or discharge power.
Important Safety Precautions
Never use the following methods to activate a lithium battery:
- Shorting the positive and negative terminals
- Bypassing the BMS
- Applying an uncontrolled voltage
- Opening the battery enclosure
- Modifying internal wires
- Repeatedly resetting the battery without checking the alarm code
- Using an incompatible charger
If the battery shows swelling, leakage, smoke, abnormal heat, burn marks or serious physical damage, stop the installation and contact the supplier.
Information to Send the Supplier
If the battery cannot be activated, provide:
- Battery model and serial number
- Inverter brand and model
- Measured battery voltage
- Battery alarm code
- Photos of the power connections
- Photos of the communication connections
- Charging voltage and current settings
- DIP-switch positions
- A short startup video
Complete information helps the battery manufacturer identify whether the problem is caused by the battery, charger, inverter, wiring or communication settings.
Conclusion
A new LiFePO4 battery may arrive switched off or in BMS sleep mode. In most cases, it can be activated by following the correct switch, button, charger or inverter startup procedure.
Before activation, always inspect the battery, confirm polarity, verify inverter compatibility and use the correct communication cable.
For parallel systems, activate and check every battery separately before connecting the complete battery bank.
HIZN Lithium supplies rack-mounted, wall-mounted, floor-standing and high-voltage LiFePO4 batteries for residential, commercial and off-grid energy storage systems.
For battery selection or inverter compatibility support, please send us your inverter model, required system voltage, battery capacity, maximum load and communication requirements.